Preparing and Cleaning the Scan: Import & Repair
The initial stage of any dental workflow in Meshmixer involves importing digital scans. Begin by importing your dental scan file, typically in STL or OBJ formats, using Meshmixer’s intuitive import function. Once imported, inspect the digital model meticulously for errors, inconsistencies, or artifacts that can compromise the final output quality. Utilizing the Analysis > Inspector tool, users can quickly identify issues such as holes, non-manifold edges, or isolated surfaces. Meshmixer’s robust repair functionality automatically addresses minor imperfections and clearly highlights more significant issues that require manual intervention. Ensuring your model is error-free and watertight at this stage sets a solid foundation for subsequent workflow steps, ultimately impacting the reliability of the final printed dental appliance.
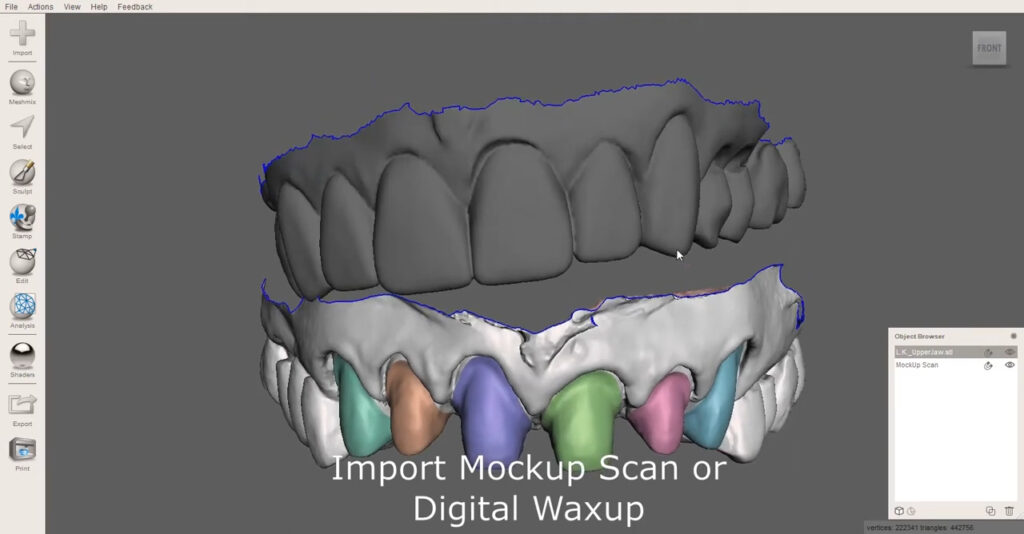
For further refinement, Meshmixer provides smoothing and sculpting brushes under the Sculpt tool, allowing users to carefully edit and perfect the digital model. This step is particularly crucial for removing unintended rough textures or correcting small anatomical inaccuracies that may have originated from scanning anomalies. Smoothing surfaces ensures a comfortable fit and accurate clinical results, especially important for precise dental applications such as surgical guides, crowns, and orthodontic aligners. Additionally, maintaining the anatomical accuracy of the digital model directly translates to better patient outcomes and reduces the likelihood of required remakes.
Practitioners are also advised to verify dimensional accuracy at this phase. Utilize Meshmixer’s measuring tools to cross-check dimensions against clinical references, ensuring that the model accurately reflects patient anatomy. This proactive quality control measure greatly contributes to effective clinical treatment planning and improves patient satisfaction.
Proceeding only after comprehensive verification and repairs ensures that all subsequent workflow stages—bases, hollowing, labeling, and orientation—are performed on a reliable and precise digital foundation, significantly enhancing overall dental treatment outcomes.
Building a Stable Base for the Dental Model
Once the digital scan has been adequately prepared, the next crucial step in the dental workflow is creating a stable and functional base for the dental model. A well-designed base ensures stability during the printing process and ease of handling during clinical procedures. In Meshmixer, this process begins by defining the desired model boundary using the Select tool. This tool helps clearly delineate the base area, ensuring optimal fit and stability. Adjusting the boundary carefully prevents distortion and preserves the anatomical accuracy of the overall dental model.
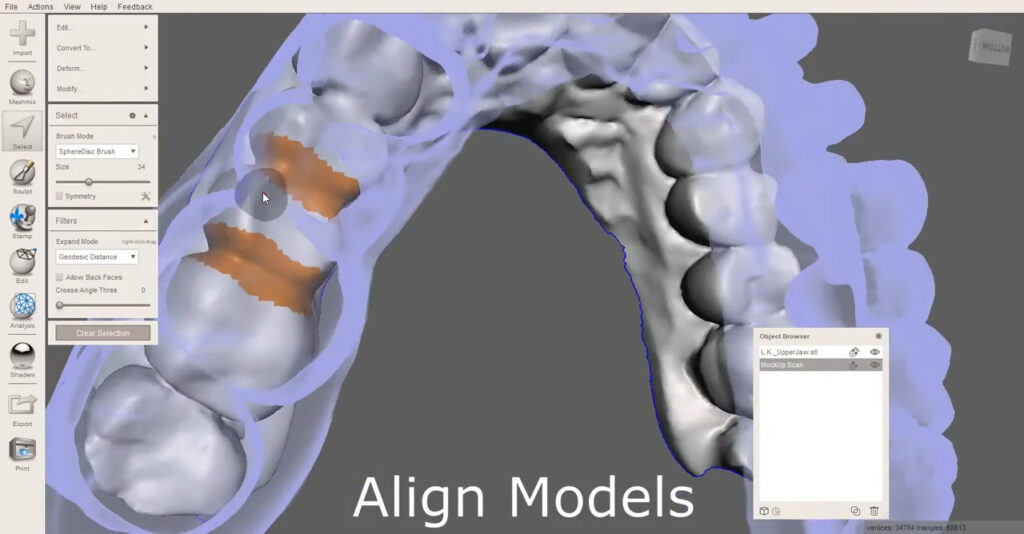
Meshmixer’s Plane Cut feature plays a significant role in achieving a precise and flat base. The Plane Cut tool enables clinicians to effortlessly generate a perfectly flat surface, enhancing stability and predictability when positioning the model on a printer’s build platform. By adjusting the plane’s angle and position, users can precisely control the final appearance and orientation of the base. Ensuring the base is flat and even helps maintain dimensional accuracy throughout the printing and curing processes.
To further optimize the base, Meshmixer offers the Offset feature, allowing users to uniformly adjust the thickness of the base according to specific clinical requirements. For dental models intended for diagnostic purposes, orthodontic appliance fabrication, or surgical planning, this precise control of base thickness can significantly impact performance, durability, and clinical functionality.
Additionally, Meshmixer facilitates the addition of retention structures or mechanical features directly into the base to ensure secure attachment to dental articulators or laboratory equipment. These enhancements provide improved clinical utility and ease of use during practical applications. Establishing a robust, accurate, and reliable base during this phase contributes significantly to streamlined workflow integration and efficient clinical procedures, ultimately improving patient outcomes.
Hollowing and Shell Control for Dental Models
Hollowing is a critical technique within dental workflows that directly impacts material usage, print time, and structural integrity of dental models. Meshmixer’s Hollow feature allows users to create a controlled inner cavity, reducing unnecessary material while maintaining a strong external surface. To begin, load the cleaned and based model into Meshmixer and navigate to Edit > Hollow. This function prompts users to specify shell thickness, which is essential to balance weight savings with the mechanical strength required for handling in a dental lab or clinical setting.
Setting an appropriate shell thickness is fundamental. For dental models intended for educational or diagnostic purposes, a shell thickness of 2–3 mm is often sufficient, offering strength without excessive material consumption. For surgical guides or models requiring frequent manipulation, a slightly thicker shell may be chosen to ensure durability. Meshmixer provides real-time feedback as parameters are adjusted, giving a clear preview of how the hollowing will affect the model’s structure.
Drain holes are another vital consideration during hollowing. Adding strategic drainage points prevents resin from pooling inside the model, which can lead to print failures or curing issues. Meshmixer allows users to add these holes interactively, placing them in low-visibility, functional areas of the model to preserve aesthetic quality. This ensures that the model remains lightweight, prints efficiently, and cures evenly after printing.
By incorporating hollowing into the workflow, dental professionals significantly reduce resin or filament consumption, translating to cost savings and environmental benefits. The hollowed models are easier to handle, lighter for shipping if necessary, and less prone to warping due to balanced material distribution. Mastering Meshmixer’s hollowing tools empowers users to produce professional-grade dental models with optimal efficiency and quality.
Labeling and Identification on Dental Models
Labeling is a fundamental aspect of dental workflows, ensuring each model is easily identifiable, traceable, and organized throughout the clinical process. Meshmixer offers robust tools for embedding text, serial numbers, or unique identifiers directly onto the surface of the digital model. To start, import the cleaned and hollowed model, then access the Sculpt or Stamp feature to position a label in an area that remains visible but does not interfere with critical anatomical details or clinical functionalities.
Using the Text Stamp tool, dental professionals can engrave patient names, case numbers, or laboratory codes directly onto the model. Meshmixer allows precise control over font size, depth, and orientation, ensuring the label is both legible and aesthetically integrated. By adjusting the projection depth, users can create labels that are recessed into the model’s surface, reducing the risk of abrasion or wear during handling and cleaning.
It is important to consider placement strategically. Labels should be positioned on non-functional surfaces such as the model base or posterior areas that do not interact with dental appliances or restorations. This careful placement ensures that the integrity of the model’s functional anatomy remains uncompromised while maintaining clear identification.
Meshmixer also supports the integration of logos or graphical elements through the use of custom stamps. Laboratories can apply branding or certification marks, adding professional value and aiding in workflow traceability. This customization provides long-term benefits in organizing case files, reducing errors, and improving communication between laboratories, clinicians, and other stakeholders.
By incorporating clear, durable labeling early in the workflow, dental teams can streamline their operations, maintain organized records, and ensure each model remains correctly associated with its corresponding treatment plan, all without sacrificing print quality or clinical functionality.
Optimal Orientation for Printing Dental Models
Orientation is a decisive factor in the quality, strength, and surface finish of dental models. In Meshmixer, users can leverage the Transform and Orientation tools to carefully position the model on the virtual build platform. The primary goal is to minimize overhangs, reduce the need for supports, and achieve the smoothest possible surfaces on critical anatomical areas. By tilting or rotating the model, dental professionals can strategically direct layer lines and support placements to non-critical regions, preserving detail on occlusal surfaces and margins.
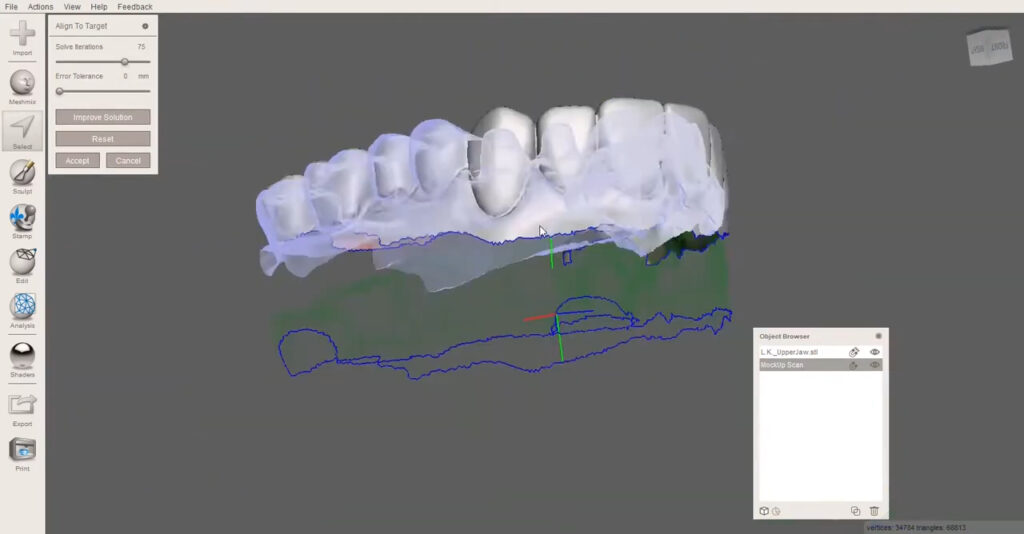
When orienting a dental model, consider the type of 3D printer being used. For resin-based SLA or DLP printers, angling the model at 30–45 degrees often provides an optimal balance between detail retention and support efficiency. This orientation allows resin to drain efficiently during printing and reduces the likelihood of air bubbles or trapped uncured material. In contrast, FDM printers may require flatter orientations with minimal overhangs, utilizing supports sparingly to maintain surface quality.
Meshmixer’s built-in analysis tools help visualize potential problem areas during orientation. Users can simulate build layers, identify regions requiring supports, and experiment with incremental adjustments to refine positioning. The software’s real-time feedback encourages iterative testing until an optimal configuration is achieved. Additionally, consider adding custom supports or sacrificial structures in Meshmixer to further improve print success rates.
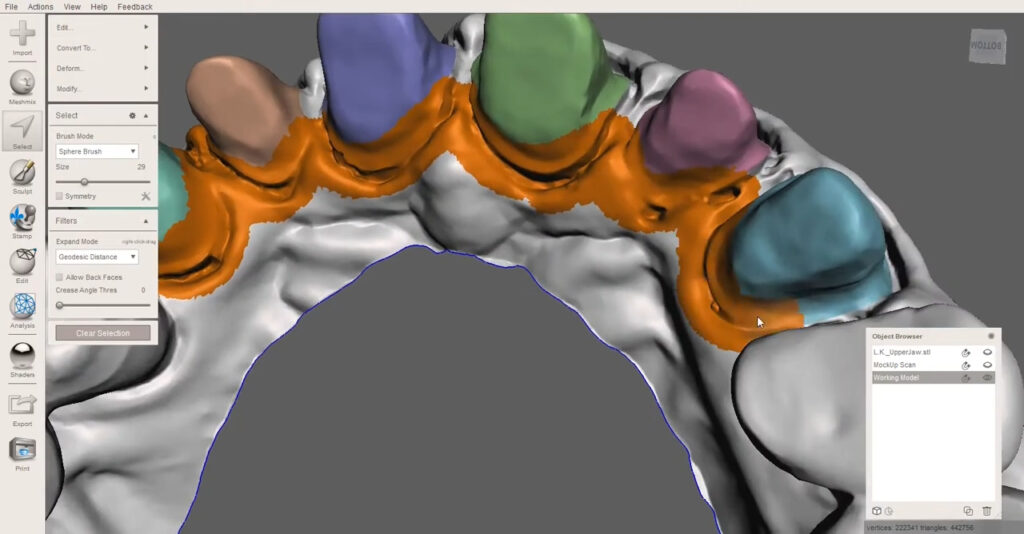
Proper orientation also affects post-processing. By positioning the model to minimize support contact on critical surfaces, less sanding or polishing is required, preserving fine details. Effective orientation contributes to faster production cycles, reduced material waste, and improved overall aesthetics. Mastering this final step in Meshmixer’s workflow ensures that dental models are printed efficiently, accurately, and ready for immediate clinical or laboratory use.
Final Checks, Export, and Workflow Integration
After creating a stable base, hollowing the model, adding labels, and orienting it correctly, the final step involves conducting comprehensive checks before export and integration into the dental workflow. Meshmixer’s Analysis tools should be used once again to verify that the model remains error-free after all modifications. Inspect for any new non-manifold edges, thin walls, or unsupported features introduced during earlier steps. Confirm that labels are properly embedded and that drainage holes remain open and correctly positioned.
Next, review the mesh resolution and polygon count. High-resolution meshes provide finer detail but can lead to large file sizes, which may not be ideal for certain printers or sharing with laboratories. Use Meshmixer’s Reduce tool to simplify the mesh intelligently without compromising critical details, striking the right balance between quality and efficiency. This step ensures smoother slicing and faster processing in downstream software while preserving the precision required for clinical applications.
Once validation is complete, export the model in a compatible format such as STL or OBJ. Name files clearly to correspond with patient or case identifiers, aligning with your labeling strategy to maintain organization. Proper documentation ensures seamless communication between the design team, dental lab, and clinical practitioners. In many cases, these files are transferred to slicing software where support structures can be fine-tuned based on printer-specific requirements.
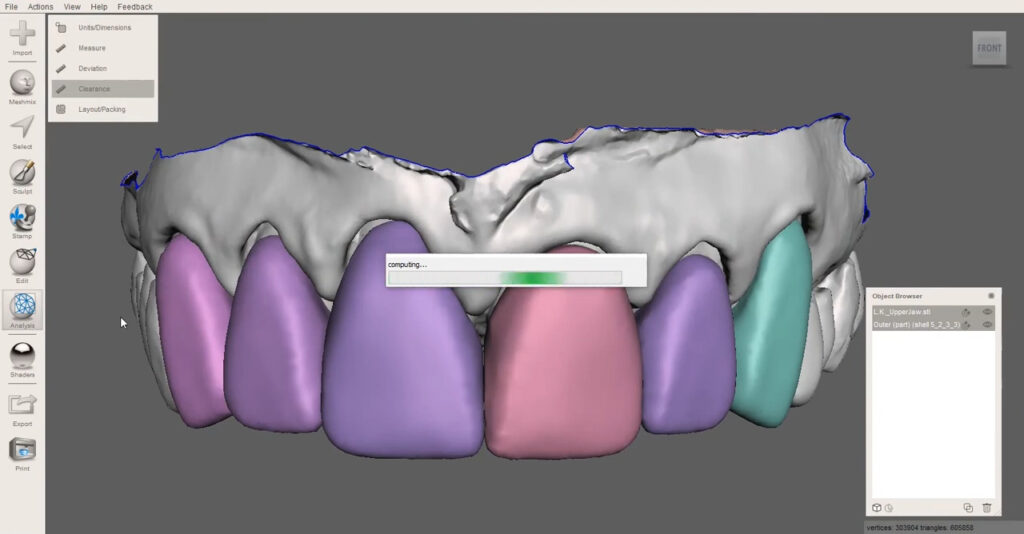
Finally, integrate the prepared model into your dental workflow. Whether printing in-house or sending to an external laboratory, having a thoroughly prepared and optimized model significantly reduces the likelihood of print failures, rework, or clinical adjustments. This step cements the value of Meshmixer as a powerful tool in dental manufacturing, supporting precise, efficient, and reliable outcomes that elevate both patient care and laboratory productivity.
Advanced Workflow Tips and Quality Assurance
After mastering the main steps of building bases, hollowing, labeling, and orienting models, dental professionals can further refine their use of Meshmixer through advanced workflow tips and robust quality assurance practices. One of the most important considerations is establishing a repeatable process. Documenting each step, along with parameters used, ensures that future cases can be prepared more quickly and with consistent results. Creating custom presets within Meshmixer, such as default hollow thickness or labeling font size, accelerates setup and minimizes manual adjustments between projects.
Regular calibration of both the software workflow and the 3D printer used is also essential. Many labs implement routine test prints using standardized models that include fine details, overhangs, and varying wall thicknesses. These test prints help in evaluating printer performance, resin behavior, and alignment of digital expectations with physical results. If deviations are detected, adjustments can be made in Meshmixer’s modeling stages before committing to patient-specific models.
Another advanced tip involves integrating Meshmixer with other CAD and inspection software. Complex restorative or orthodontic cases often benefit from round‑tripping data between Meshmixer and design platforms that handle occlusal analysis or implant planning. This collaboration allows practitioners to perform design adjustments without compromising the model integrity prepared in Meshmixer. Additionally, using Meshmixer’s measurement and annotation tools to document specific clinical notes directly onto the digital model can further enhance communication between team members.
Quality assurance also extends to post-processing checks after printing. Inspect printed models against the Meshmixer file to verify dimensional accuracy and surface quality. By incorporating these advanced workflow tips, dental teams can elevate their efficiency, minimize errors, and maintain a high standard of output that directly translates to better patient care and smoother laboratory operations.
Support Strategies for Dental Models (Resin & FDM)
Support strategies directly influence print success, surface quality, and chairside fit, so plan them deliberately in Meshmixer before exporting to your slicer. For resin workflows, begin by designating “no‑touch” zones—the occlusal table, finish lines or margins, and any scan body geometry—and route supports to the base, palatal vault, or posterior flanges. Use small contact tips between 0.3–0.5 mm on delicate anatomy and medium tips between 0.6–0.8 mm on robust regions. Lengthen branches to land on predictable, flat areas; avoid placing anchors across interproximal embrasures where removal could chip thin walls.
For study arches and aligner models, add a perimeter band or tapered raft in Meshmixer so supports have a wide, forgiving target that reduces peel forces. When printing dies or preparations, create small flat pads on the base so slender branches terminate away from margins, and bevel contact points to minimize witness marks. Calibrate exposure so tips release without tearing; over‑cured supports scar enamel replicas, while under‑cured branches drift. Provide drain holes at low points so uncured resin escapes during lifts and washes. If your slicer allows blockers, paint “no supports” on occlusal surfaces and let branches approach from the lingual or palatal side to protect detail.
Fused‑filament models demand a different playbook. Because soluble interfaces are uncommon in many labs, design to minimize support contact altogether: split arches with Plane Cut to present flatter spans, bridge shallow palatal regions, and orient so overhangs remain within the printer’s dependable threshold, typically 45–55 degrees. Where supports are unavoidable, raise Z‑distance, lower interface density, and use narrow lines so removal is clean. Add bevels to base edges to discourage elephant’s foot, and use a wider brim for bed adhesion. Post‑print, lever supports away from the base first, then clip tips with flush cutters, and finish with light scraping instead of sanding to preserve critical detail.
